The Future and Advanced Techniques for Defect Detection in Metallic Surfaces
Recent Post:
Introduction
In industries where metallic surfaces are integral to the final product, ensuring these surfaces are defect-free is essential for maintaining quality, safety, and customer satisfaction. Whether in automotive manufacturing, aerospace, or heavy machinery, even the smallest imperfection can have significant consequences, such as structural failure, increased maintenance costs, and safety risks. As a result, defect detection on metallic surfaces has become a key process in quality control, utilizing advanced technologies to meet the stringent demands of modern industries.
Achieving zero-defect production is now paramount across various sectors, from automotive and aerospace to construction and manufacturing. In these industries, surface defect detection is particularly critical, as even minor flaws can impact structural integrity, product performance, functionality, and aesthetics. Effective inspection methods are essential to identify and address these anomalies, ensuring products meet the highest standards of quality and safety. Traditional inspection methods, however, are often labor-intensive, time-consuming, and susceptible to human error. Fortunately, technological advancements have paved the way for sophisticated, automated techniques that significantly enhance the efficiency and accuracy of defect detection, helping industries maintain excellence in their metallic components.
Achieving zero-defect production is now paramount across various sectors, from automotive and aerospace to construction and manufacturing. In these industries, surface defect detection is particularly critical, as even minor flaws can impact structural integrity, product performance, functionality, and aesthetics. Effective inspection methods are essential to identify and address these anomalies, ensuring products meet the highest standards of quality and safety. Traditional inspection methods, however, are often labor-intensive, time-consuming, and susceptible to human error. Fortunately, technological advancements have paved the way for sophisticated, automated techniques that significantly enhance the efficiency and accuracy of defect detection, helping industries maintain excellence in their metallic components.
Key Points on Defect Detection in Metallic Surfaces
1. Importance for Quality and Safety
Defect detection in metallic surfaces is crucial for maintaining product quality and safety. Identifying and rectifying flaws prevents product failure, accidents, and injuries, and ensures compliance with safety standards and regulations, protecting the company's reputation.
2. Variety of Defects
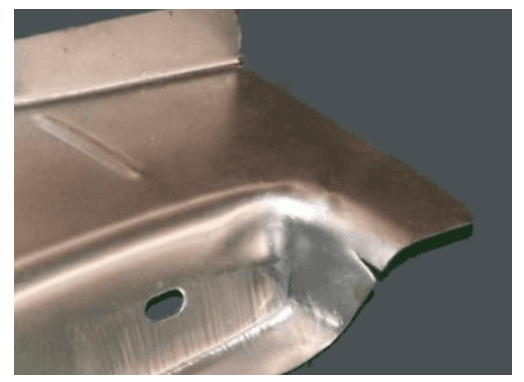
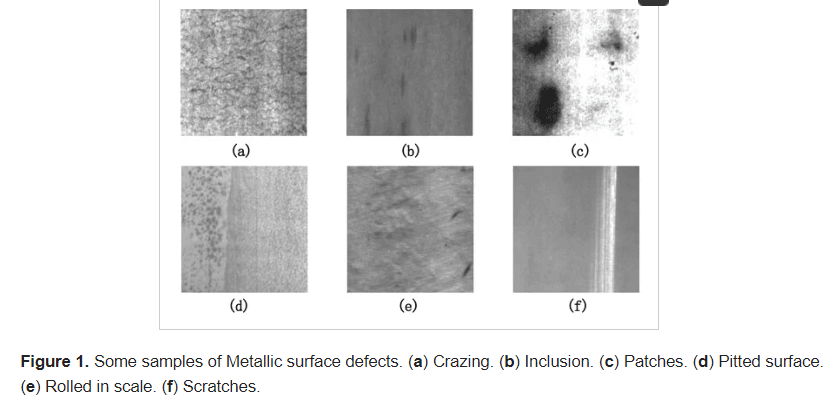
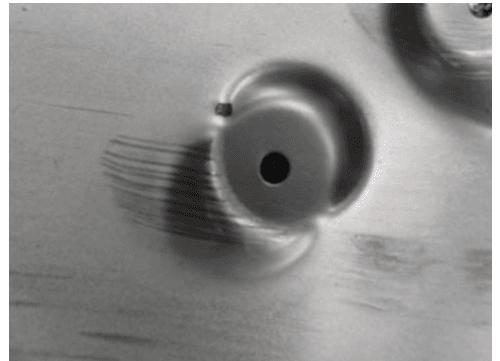
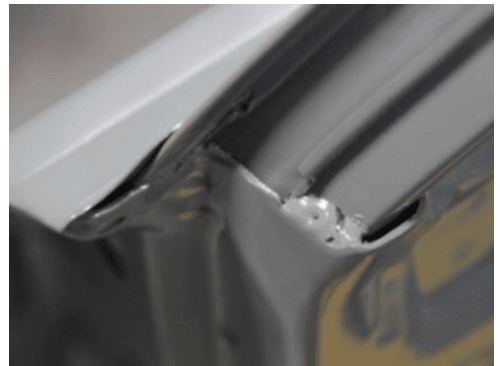
Defects in metallic surfaces range from visible issues like scratches, dents, and corrosion to less obvious imperfections such as cracks, voids, and inclusions. Early detection of these defects is essential to avoid costly recalls, reduce waste, and enhance the durability and reliability of the final product.
3. Challenges of Traditional Methods
raditional defect detection relied heavily on manual visual inspections by skilled workers. This method, while somewhat effective, is limited by human error, fatigue, and subjective assessments. As manufacturing becomes more complex and production volumes increase, there is a growing need for more reliable and automated solutions.
4. Advancements in Inspection Techniques
Modern defect detection employs various techniques including:
- Visual Inspection: Basic and straightforward but limited by human factors.
- Light Enhancement Techniques: Improve the visibility of defects.
- Non-Destructive Testing (NDT): Methods like ultrasonic testing, radiographic testing, and eddy current testing provide deeper insights without damaging the product.
5. Automated Optical Inspection (AOI)
AOI systems use high-resolution cameras, advanced lighting, and sophisticated software algorithms to pethroughthroughrform faster, more objective, and accurate inspections compared to traditional methods.
6. Role of AI and Machine Vision
AI and Machine Vision are transforming defect detection by improving the accuracy of flaw identification, reducing false alarms, and enabling predictive maintenance through continuous learning and adaptation.
7. Future Technologies
The future of metal inspection includes enhanced precision and reliability through AI, Machine Learning (ML), and integration with technologies like 3D scanning and laser profilometry, which will offer more comprehensive surface inspections.
Common Types of Metal Surface Defects
Before exploring detection methods, it's essential to understand the various types of defects that can occur on metallic surfaces:
- Surface scratches: These are linear imperfections caused by abrasion.
- Pitting: Small depressions or holes on the surface.
- Cracks: Breaks or fractures in the metal.
- Inclusion: Foreign particles embedded in the metal.
- Surface roughness: Unevenness of the surface texture.
- Corrosion: Deterioration of the metal due to chemical or electrochemical reactions.
Benefits of Automated Defect Detection
- Increased efficiency: Faster inspection speeds and higher throughput.
- Improved accuracy: Reduced human error and consistent defect detection.
- Cost savings: Lower labor costs and fewer defects leading to rework.
- Data-driven insights: Collects valuable data for process optimization.
The Rise of Automated Defect Detection: Advanced Techniques Transforming Quality Control
Modern industries are increasingly adopting automated systems to enhance efficiency and accuracy.
Here's how advanced technologies are transforming defect detection:
1. Computer Vision in Defect Detection:
Computer vision is a powerful technique used to analyze images of metallic surfaces for detecting defects such as cracks, corrosion, and scratches. By leveraging high-resolution cameras and advanced algorithms, this approach offers a reliable and efficient solution for quality control.
The process begins with image acquisition where high-resolution cameras capture detailed images of the metal surface. These images undergo preprocessing to enhance contrast and remove noise, ensuring clarity.
Next, feature extraction algorithms identify critical elements such as edges, textures, and shapes. Finally, defect classification is performed using machine learning models that categorize defects based on the extracted features.
This streamlined process enhances defect detection, making it an invaluable tool for maintaining product quality and safety.
2. Machine Vision and Artificial Intelligence (AI):
Machine Vision and Artificial Intelligence (AI) are transforming defect detection in manufacturing by combining the strengths of high-resolution cameras and advanced algorithms. Machine vision systems quickly and consistently analyze large areas, detecting even the smallest defects with high accuracy. AI enhances this process by training algorithms on extensive datasets, allowing them to recognize subtle anomalies that might be missed by human inspectors.
These technologies offer several benefits:
- Learning and Adaptation: Machine learning algorithms continuously improve, becoming better at identifying new and complex defects over time.
- Reduced False Positives: AI helps filter out irrelevant variations in surface texture, minimizing false alarms.
- Predictive Maintenance: By analyzing historical data, AI can predict potential defects, enabling preventative maintenance and process adjustments.
Machine vision systems are now essential in modern manufacturing, providing real-time inspection and immediate feedback on production lines. This ensures that any defects are caught early, preventing defective products from progressing further in the production process. The integration of AI and machine learning makes these systems more accurate and versatile, improving overall quality control across various industries.
3. Automated Optical Inspection (AOI):
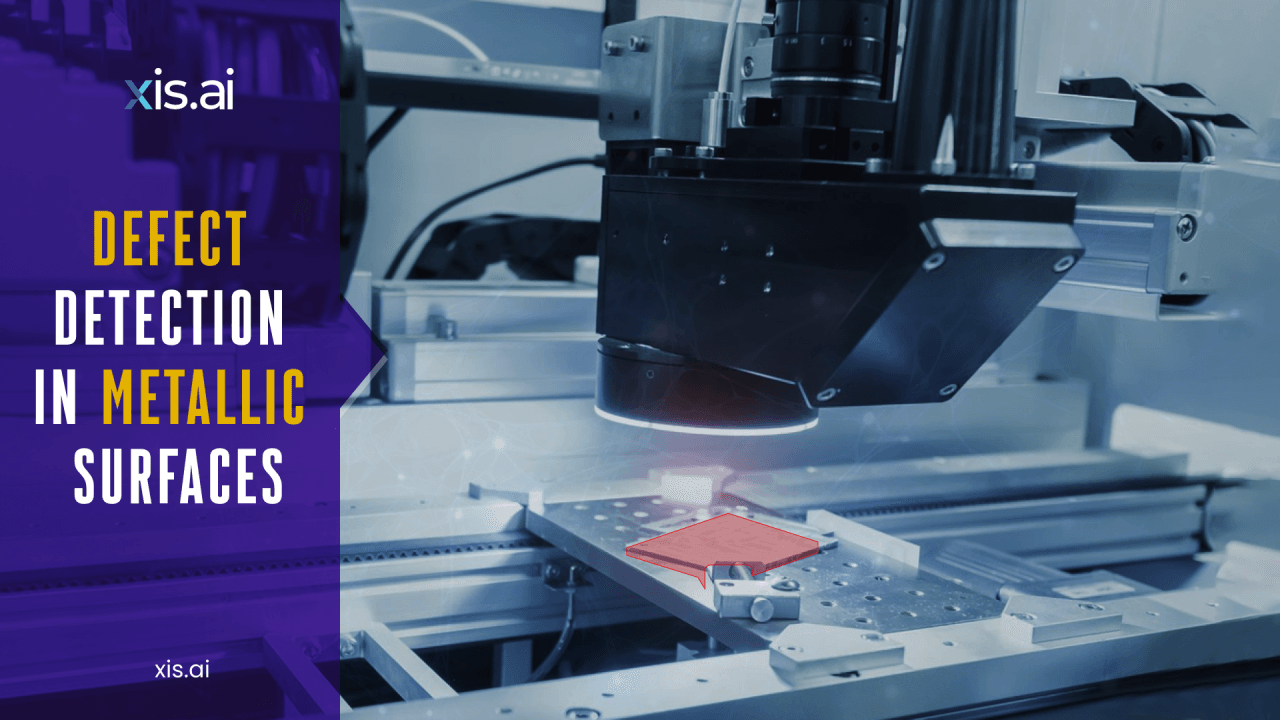
AOI has emerged as a cornerstone of modern defect detection. Utilizing high-resolution cameras and advanced lighting systems, AOI captures detailed images of products in real time. Sophisticated software algorithms then analyze these images to identify defects with unparalleled precision. Unlike manual inspections, AOI provides consistent results, reducing the risk of human error and increasing inspection speeds.
4. Non-Destructive Testing (NDT) Techniques:
Non-destructive testing methods, such as ultrasonic testing, eddy current testing, and infrared thermography, are widely used for detecting internal defects in metallic surfaces. These techniques allow for the inspection of the material's integrity without causing any damage. For instance, ultrasonic testing uses high-frequency sound waves to detect internal cracks or voids, while eddy current testing utilizes electromagnetic fields to identify surface and subsurface defects. These methods are particularly valuable in industries where safety and reliability are paramount, such as aerospace and nuclear power.
- Infrared thermography: Detects temperature variations associated with defects.
- X-ray inspection: Provides detailed internal images of the metal.
- Ultrasonic Detection: Ultrasonic detection is a non-destructive testing technique that uses high-frequency sound waves to detect defects in metals . This technique is effective in detecting minute flaws and cracks in metallic surfaces.
- Magnetic particle inspection: Used for detecting surface and subsurface cracks, but it has limitations for non-ferromagnetic metals.
- Dye penetrant inspection: Effective for detecting surface cracks, but preparation and processing time can be lengthy.
5. 3D Scanning and Laser Profilometry:
3D scanning and Laser profilometry are powerful tools for detecting surface irregularities and measuring surface roughness. These techniques involve scanning the metallic surface with a laser beam, and creating a precise 3D map of the surface topography. Any deviations from the desired surface profile can be quickly identified, enabling manufacturers to address defects before they lead to product failures.
6. Traditional visual inspection:
Traditional visual inspection relies on the human eye, where trained inspectors carefully examine surfaces for flaws like scratches, cracks, dents, discoloration, or texture issues under proper lighting. While this method is fast and cost-effective, it has its limitations. Accuracy can be subjective, as it depends on the inspector's experience and alertness, which can be affected by fatigue. Additionally, human eyes may struggle to detect microscopic defects, and training new inspectors to reach the skill level of experienced ones can take months.
7. Light Enhancement Techniques:
Enhancing defect detection through advanced lighting techniques significantly improves visual inspections. Angle lighting highlights defects like cracks and dents by casting shadows, while diffuse lighting offers a clear view of larger flaws by minimizing shadows. Fluorescent Penetrant Inspection (FPI) uses a glowing liquid under UV light to reveal cracks, and RGB lighting enhances surface details with flexible color combinations. These methods make defects more visible and, when combined with automation, greatly boost the accuracy and reliability of inspections.
Light-up techniques provide a cost-effective method to enhance visual inspections, but they have their limitations. They may not identify all types of defects and can be subject to the inspector's subjective interpretation.
Light-up techniques provide a cost-effective method to enhance visual inspections, but they have their limitations. They may not identify all types of defects and can be subject to the inspector's subjective interpretation.
Challenges in Defect Detection
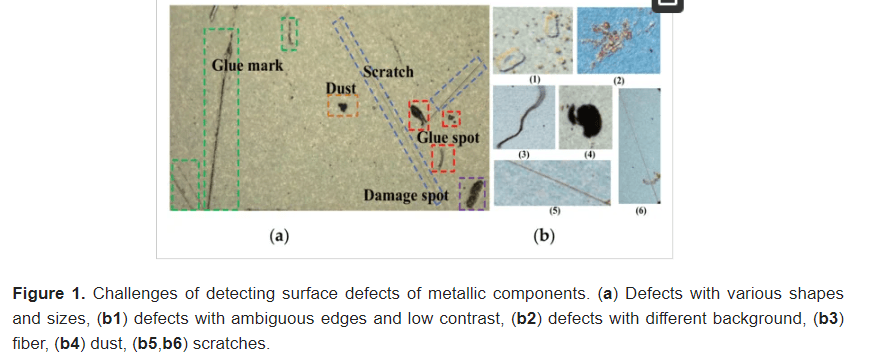
Despite significant advances in defect detection techniques, several challenges remain:
- Limited Data Availability: Insufficient data can hinder the development of accurate machine learning models for defect detection.
- Complexity of Metallic Surfaces: The intricate nature of metallic surfaces can make it difficult for computer vision systems to detect defects accurately.
- Integration Costs: Incorporating advanced detection technologies into existing production lines can be complex and expensive.
- Data Management: High-resolution imaging and non-destructive testing (NDT) generate large volumes of data that require robust management and processing capabilities.
- Complex Defect Patterns: Some defects are challenging to distinguish from normal surface variations.
- Real-Time Processing: High-speed inspection demands efficient algorithms to process data in real-time.
- Data Privacy and Security: Ensuring the protection of sensitive manufacturing data is essential.
Future Directions
The future of defect detection in metallic surfaces is promising, with several key advancements on the horizon:
- Integration of AI, IoT, and Edge Computing: These technologies will enhance real-time monitoring and decision-making, improving product quality and reducing downtime.
- Enhanced Automation: Ongoing developments in automated systems will increase efficiency and precision in detecting defects.
- Sustainability: Advanced detection systems will help minimize waste and optimize resource usage as sustainability becomes more important.
- Advanced Algorithms: Research will focus on creating more robust algorithms to handle complex defects and improve accuracy.
- Multiple Sensing Modalities: Combining various sensing technologies will lead to more comprehensive defect detection.
- AI-Powered Edge Systems: Deploying AI at the edge will enable real-time analysis and decision-making, advancing defect detection capabilities.
Looking ahead, the field will see further improvements with self-learning systems that adapt from real-time data, real-time defect correction through robotic integration, and predictive maintenance based on defect detection data. Embracing a combination of traditional methods, NDT techniques, and advanced AI-driven systems will lead to superior quality control and a more efficient, cost-effective manufacturing process for metallic surfaces.
Conclusion
Defect detection in metallic surfaces is essential for ensuring the quality and safety of products across various industries. Minor imperfections can significantly affect a component's structural integrity, functionality, and appearance. Advanced techniques like machine vision, AI, ultrasonic detection, and laser scanning offer precise, efficient, and cost-effective solutions for identifying defects. While traditional methods have their limitations, modern technologies pave the way for faster and more consistent inspections. As these technologies evolve, particularly with the integration of machine learning, they will continue to enhance defect detection, ensuring that metallic components meet the highest standards of quality and safety.
About xis.ai
xis.ai automates visual quality inspection with AI and robotics. With a camera and no code computer vision platform that enables non-technical industrial users to develop, deploy, and use automated visual inspection (AOI) in any industry in minutes.
References
https://www.rebondtech.com/6-common-defects-in-sheet-metal-forming/
https://www.mdpi.com/2076-3417/8/9/1575
https://www.mdpi.com/1424-8220/20/6/1562
https://www.mdpi.com/2076-3417/8/9/1575
https://www.mdpi.com/1424-8220/20/6/1562
Comment
0Comments
No comments yet.


