


Building an AI Model for Quality Inspection: A Step-by-Step Guide
Recent Post:

In AI, models serve as its pillars by analyzing any provided data to detect patterns that lead to solving intricate issues. Their applicability ranges from industry automation, accuracy, & the ability to yield AI models on a massive scale to aiding the development of innovations such as healthcare diagnostics, predictive analytics, autonomous systems, & personalized recommendations. AI models play a monumental role in society, allowing businesses and researchers to make calculated decisions. From altering data to adapting to new information, AI models allow society to make faster, smarter, and more informed decisions moving forward.
How to Build an AI Model for Quality Inspection Using xis.ai
xis.ai provides an easy-to-use platform for training and deploying computer vision models for quality inspection tasks. Here’s a step-by-step guide:
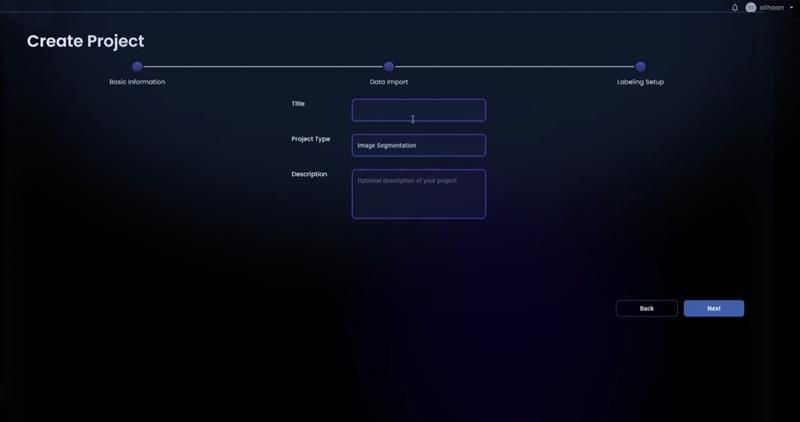
1. Create a New Project:
- Create a Project.
Enter the following details:
- Project Name: A detailed name descriptor of the project (e.g., “Nuts Quality Inspection).
- Project Description: Define the project goals in a sentence or two (e.g., “A deep learning object detection model to classify images with and without nuts for quality inspection.”).
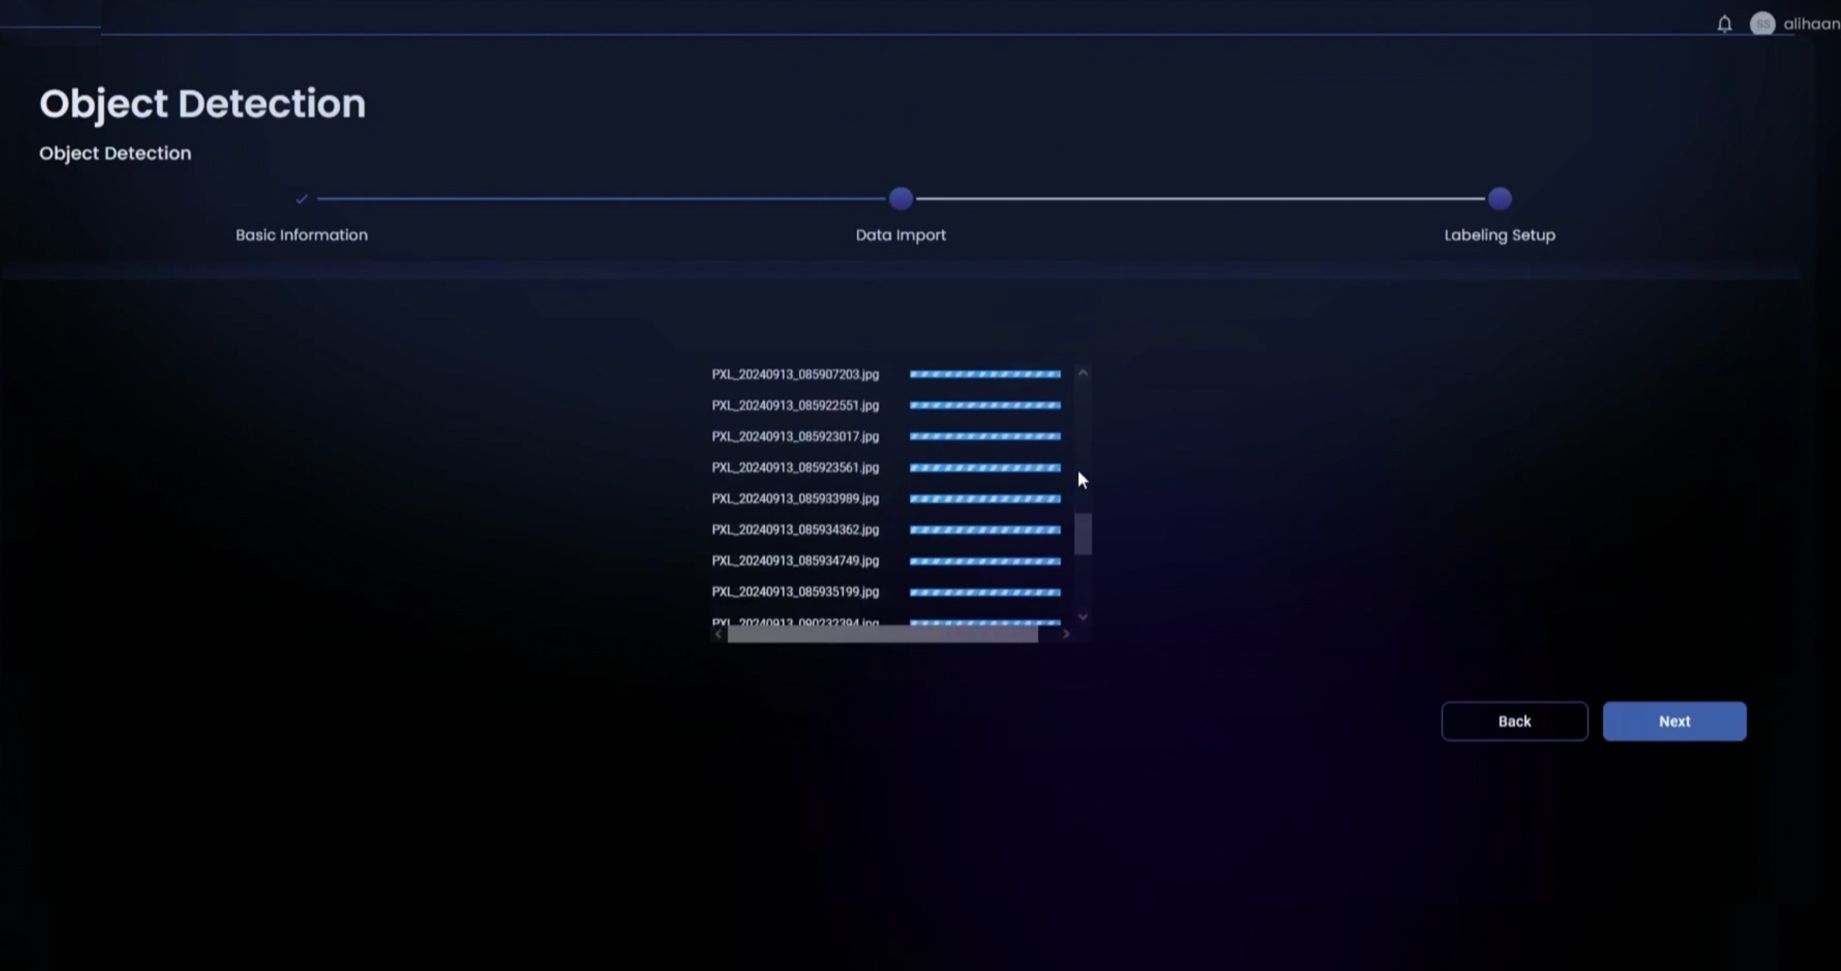
2. Upload Dataset:
- Import Dataset
- Upload Dataset press it, and add your images.
Tips are:
Try to upload as many images with good resolution and lighting properties.
The object of interest must be consistent
The aspect ratio is good to be consistent
Image angle is required to be consistent (i.e. landscape or portrait).
3. Labelling Configuration:
Create Classes: In this stage, Create two different classes:
- With a Nut – An object that contains a nut
- Without a Nut – An object that does not contain a nut.
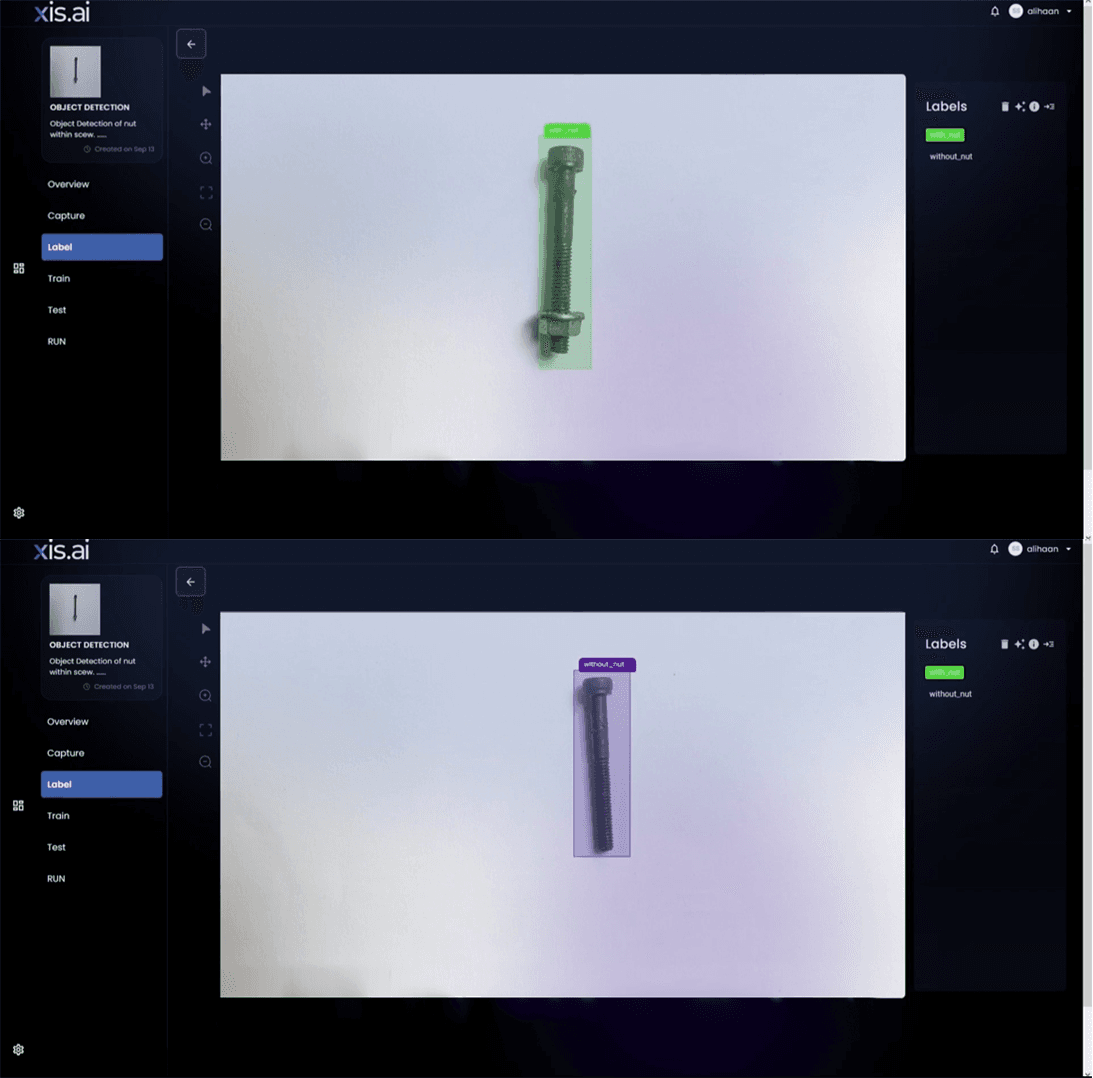
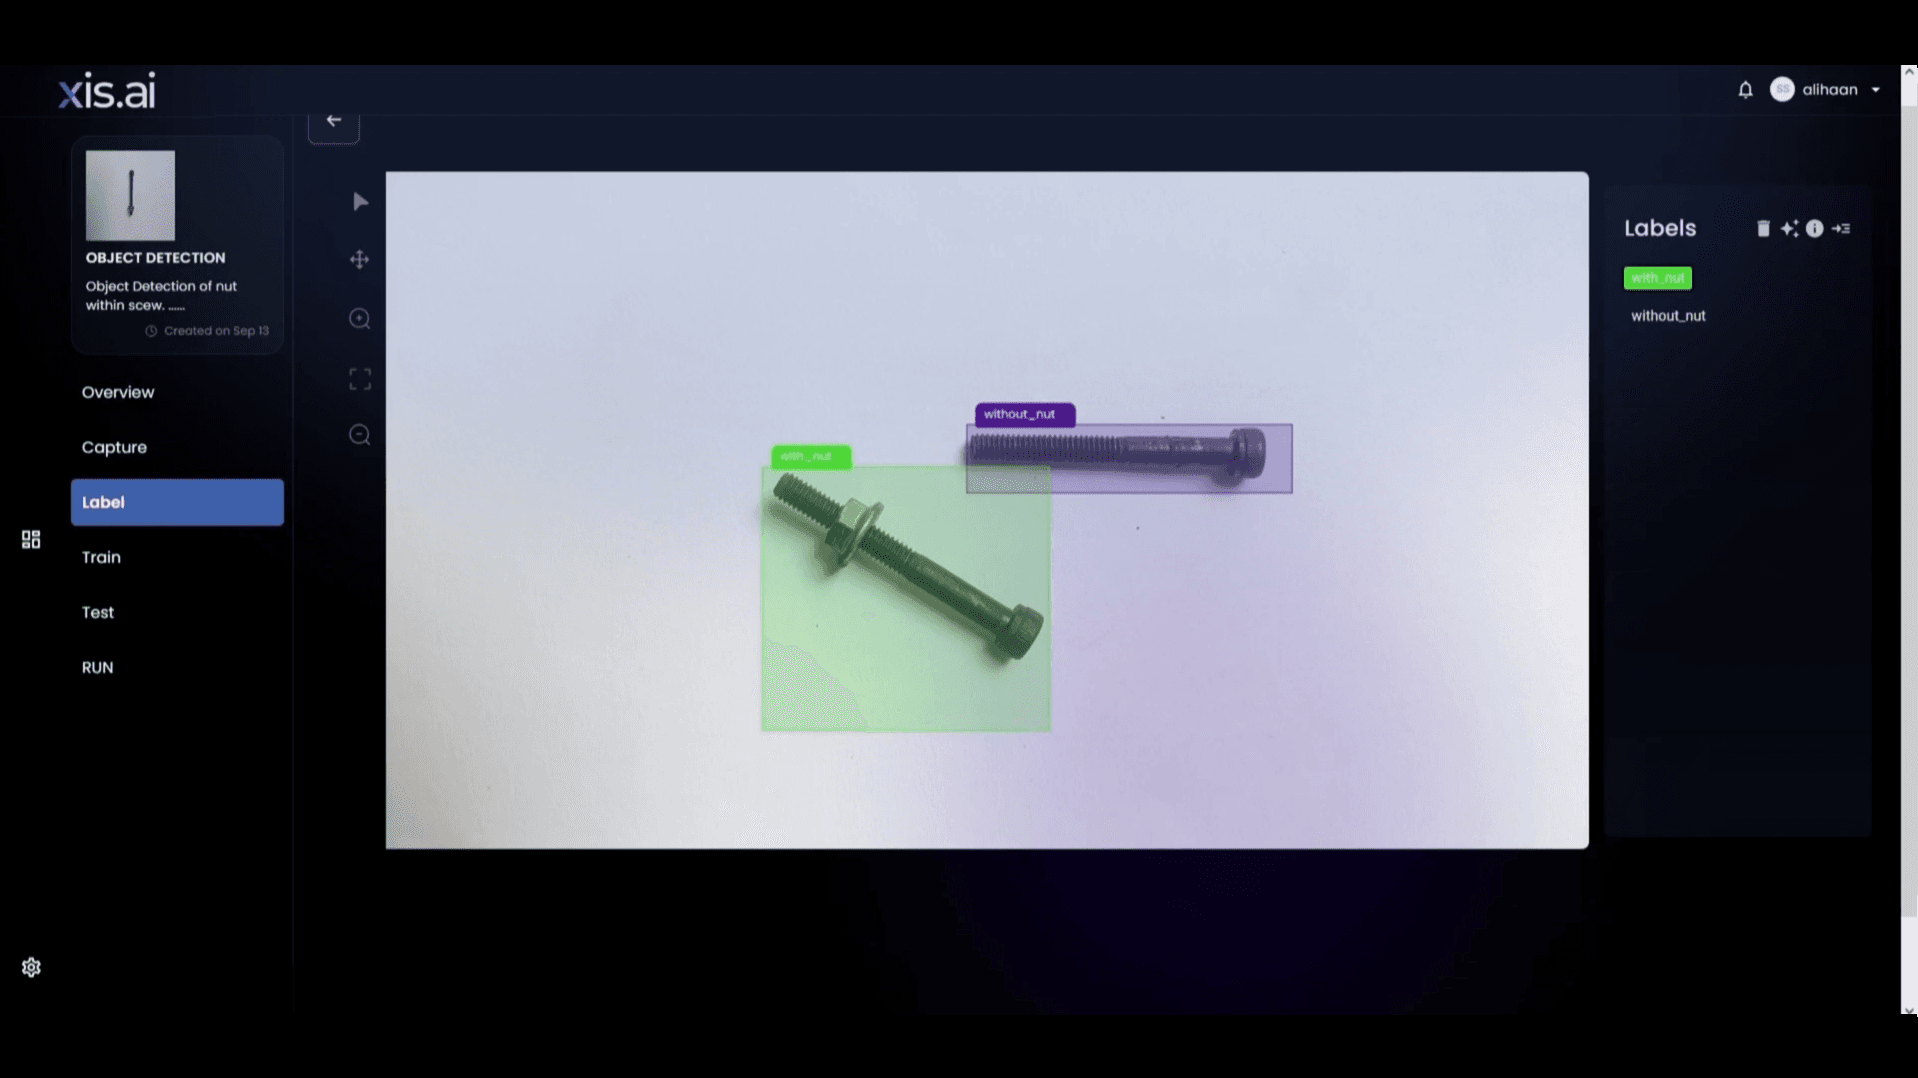
4. Data Labelling:
- After labeling configuration, the dataset is ready to label using the xis.ai interface.
- For each image, draw bounding boxes on the image like “With Nut” or “Without Nut.”
- The labeled dataset needs to be saved.
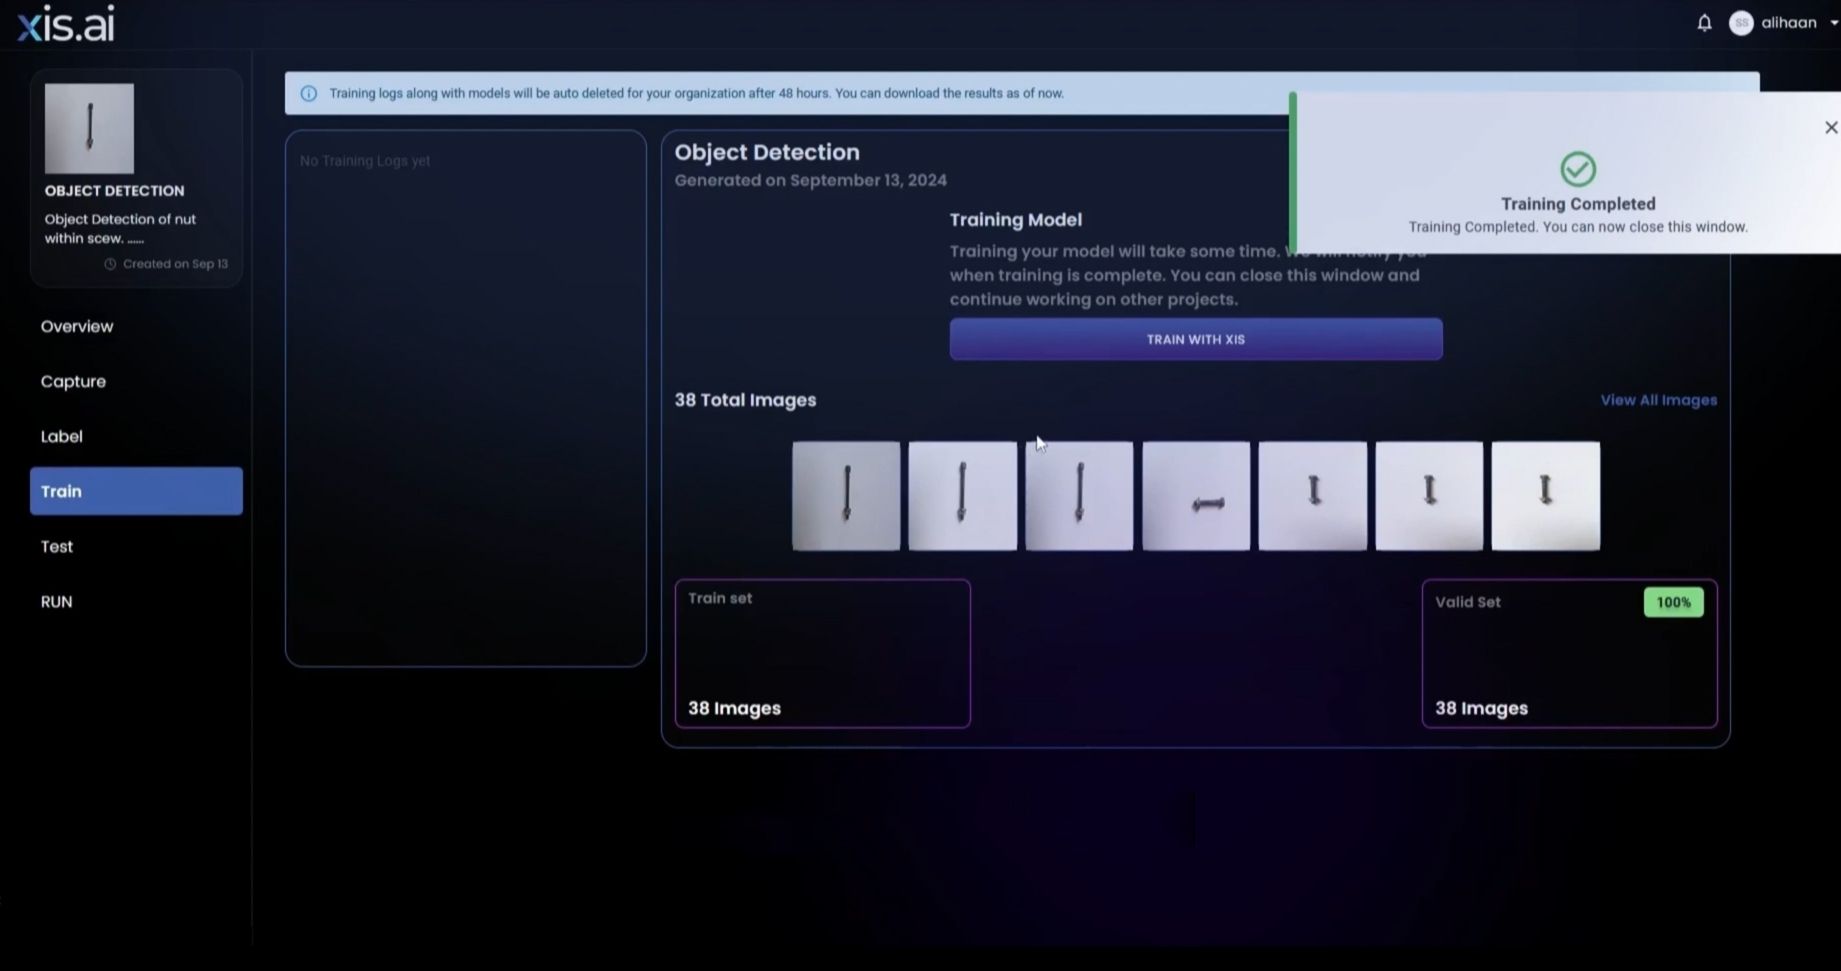
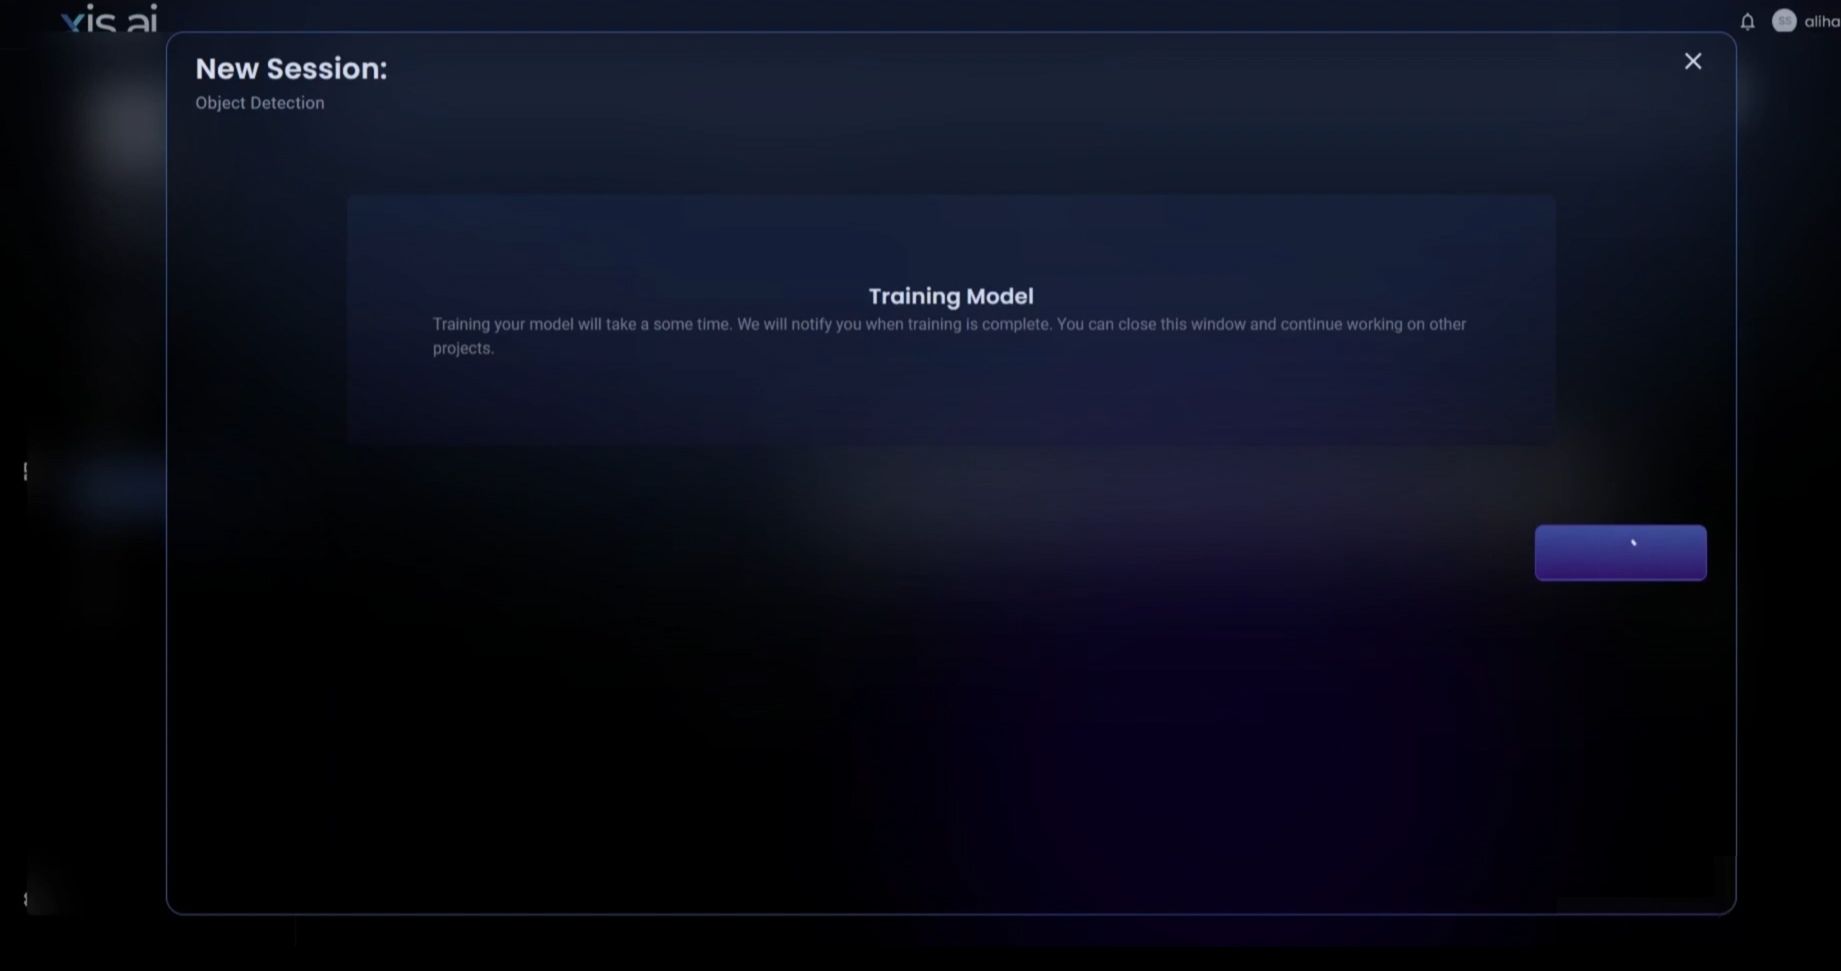
4. Model Training:
- Launching the Training
- After labeling is complete, go to the Training tab.
- Simply press the "Start Training" button without configuring anything. The training will begin using state-of-the-art models.
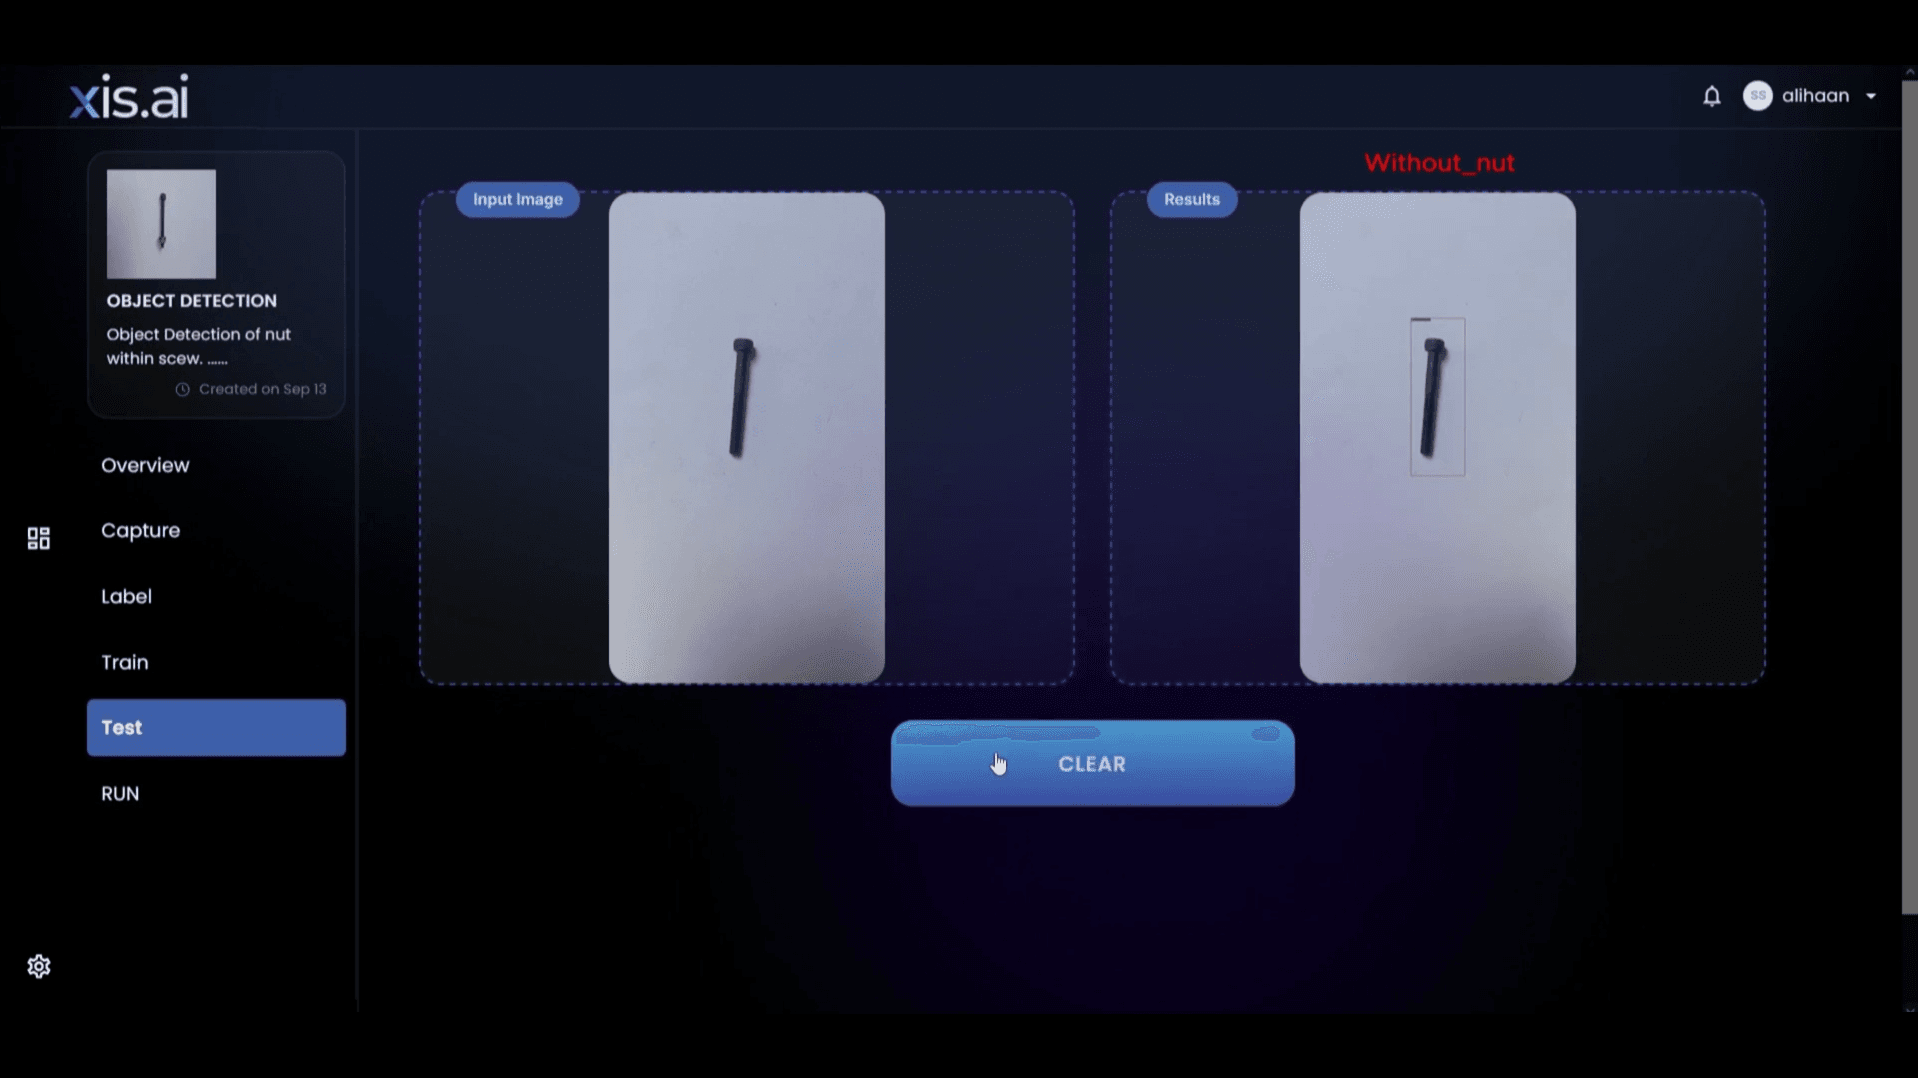
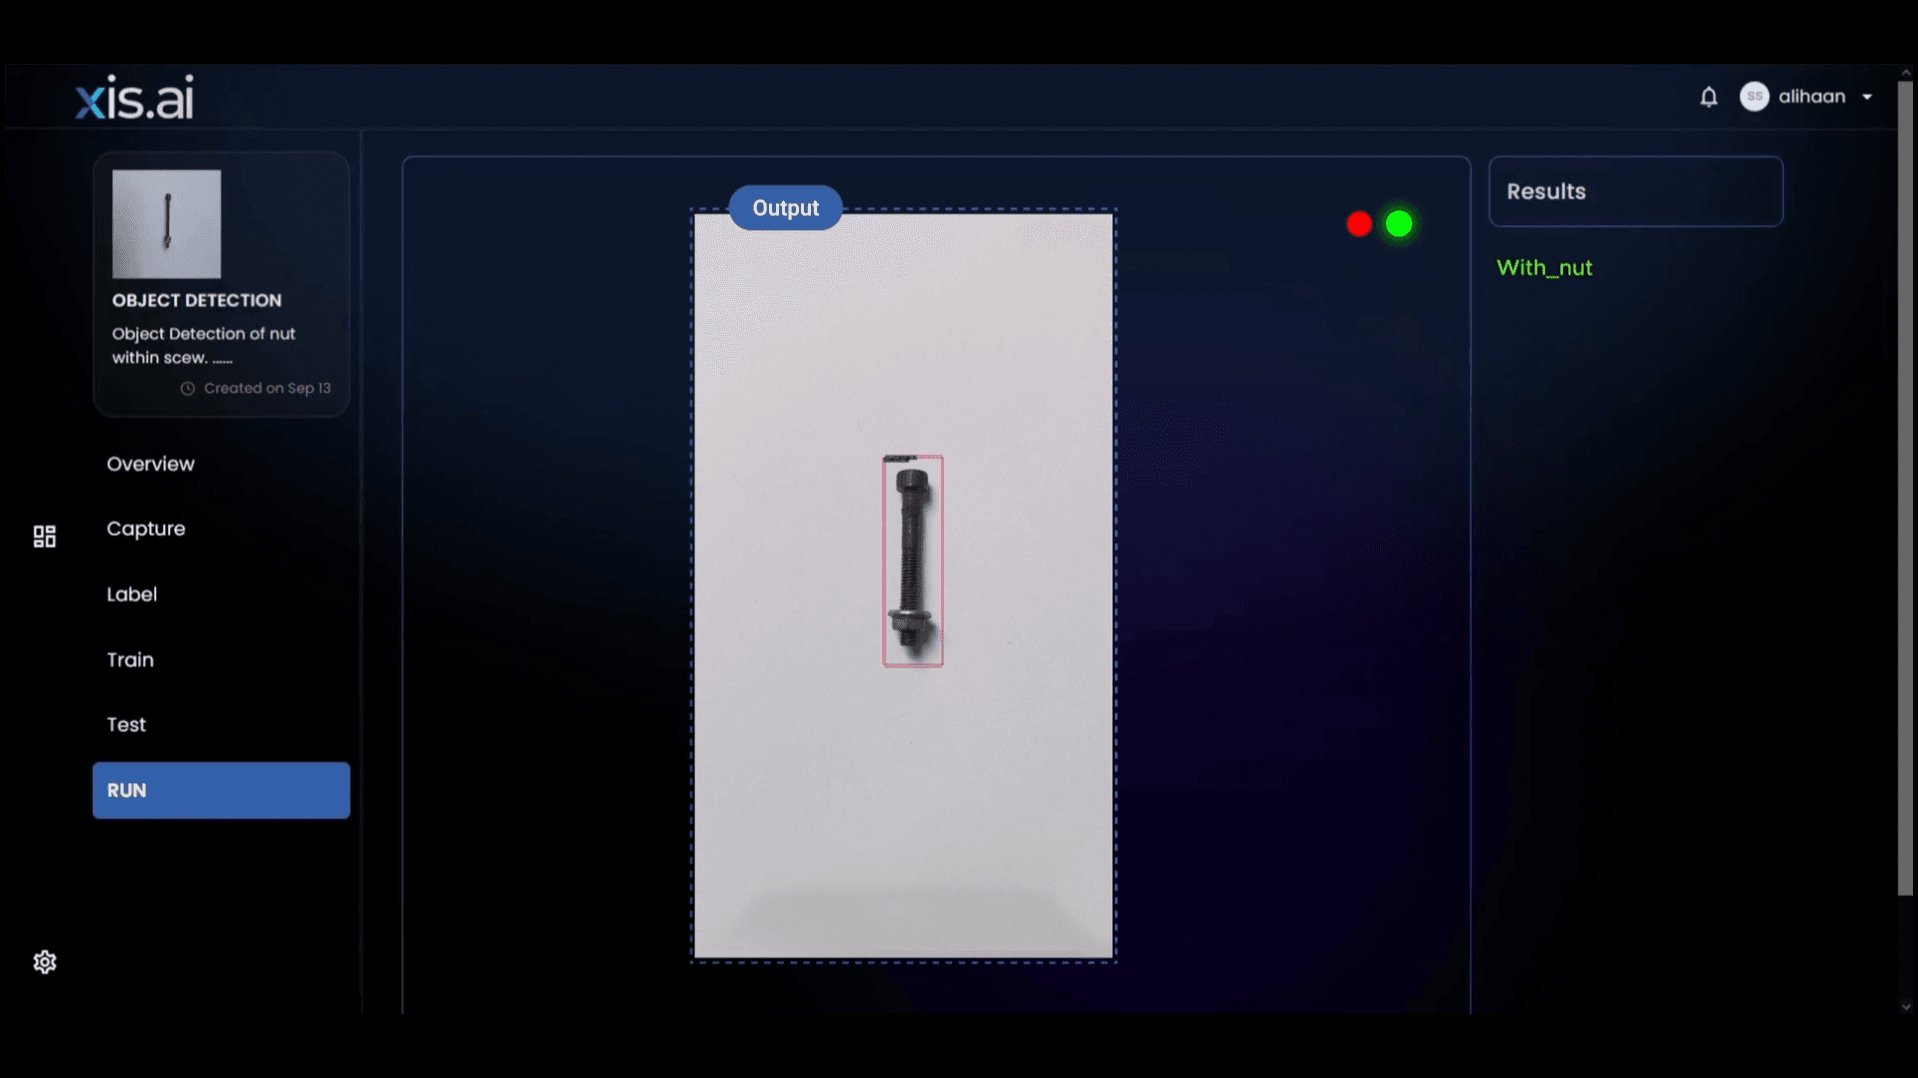
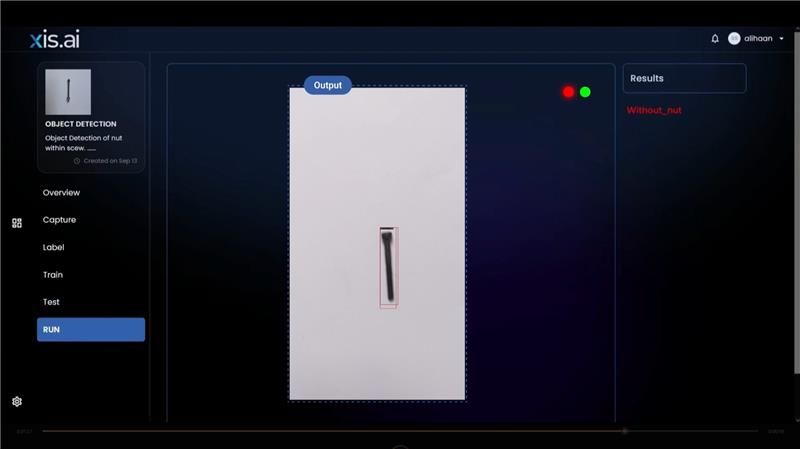
5. Model Testing:
- When the model has finished training, test the model using the xis.ai inference interface.
- Check the output of the model, and whether the model has been able to differentiate the objects into “With Nut” and “Without Nut”.
6. Deployment:
- The model is ready to deploy in runtime and use it to detect objects in real time.
- With xis.ai anyone can easily build and deploy a complete pipeline of computer vision models in just a few minutes.
What xis.ai offers?
Building an AI model with xis.ai is completely hassle-free due to its intuitive and easy-to-use interface. The platform simplifies the process, eliminating the need for complex configurations or technical expertise. With xis.ai, anyone even those without prior AI development experience can effortlessly create, train, and deploy AI models with just a few clicks. Its well-designed system ensures accessibility for beginners while offering powerful capabilities for advanced users.
Build An AI Model With xis.ai
Building an AI model for quality inspection requires precision and expertise. At xis.ai, we specialize in developing customized AI solutions tailored to your inspection needs. Our approach focuses on high-quality datasets, robust data pipelines, and aligning AI models with business objectives. Using technologies like computer vision and deep learning, we enhance inspection accuracy and operational efficiency.
AI models require continuous refinement to adapt to new data and deliver sustained value. We ensure the right tools, scalable infrastructure, and regulatory compliance for long-term success. Reach out to explore how xis.ai can transform your quality inspection process.
Comment
0Comments
No comments yet.
